How to Implement Feature Flags in Rails
Hello! In this tutorial, we’ll show you how to add feature flags to your Ruby on Rails app, using Unleash and the official Unleash Ruby SDK. With Unleash, an open-source feature flag service, you can use our tooling to add feature flags to your application and release new features faster.
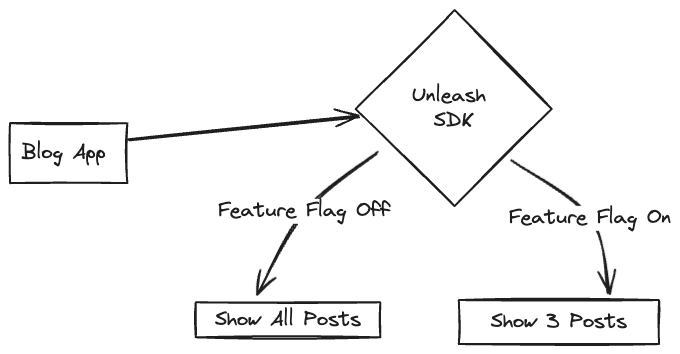
In a classic tutorial fashion, we’ll add feature flags to a blog app made with Ruby on Rails. We’ll use feature flags to decide how many blog posts to show on the index page.
- Prerequisites
- 1. Best practices for back-end apps with Unleash
- 2. Install a local feature flag provider
- 3. Setup the Rails app
- 4. Restrict the number of posts
- 5. Add Unleash to your Rails app
- 6. Verify the toggle experience
- Conclusion
Prerequisites
For this tutorial, you’ll need the following:
- Rails v7+
- Git
- Docker and Docker Compose
The Unleash Server is a Feature Flag Control Service, which manages your feature flags and lets you retrieve flag data. Unleash has a UI for creating and managing projects and feature flags. There are also API commands available to perform the same actions straight from your CLI or server-side app.
1. Best practices for back-end apps with Unleash
Rails is a back-end framework, so there are special considerations to plan around when implementing feature flags.
Most importantly, you must:
- Limit feature flag payloads for scalability, security, and efficiency
- Use graceful degradation where possible to improve the resiliency of your architecture
For a complete list of architectural guidelines, including caching strategies, see our best practices for building and scaling feature flag systems.
2. Install a local feature flag provider
In this section, we’ll install Unleash, run the instance locally, log in, and create a feature flag. If you prefer, you can use other tools instead of Unleash, but you’ll need to update the code accordingly. The basic steps will probably be the same.
Use Git to clone the Unleash repository and Docker to build and run it. Open a terminal window and run the following commands:
git clone https://github.com/unleash/unleash.git
cd unleash
docker compose up -d
You will now have Unleash installed onto your machine and running in the background. You can access this instance in your web browser at http://localhost:4242.
Log in to the platform using these credentials:
Username: admin
Password: unleash4all
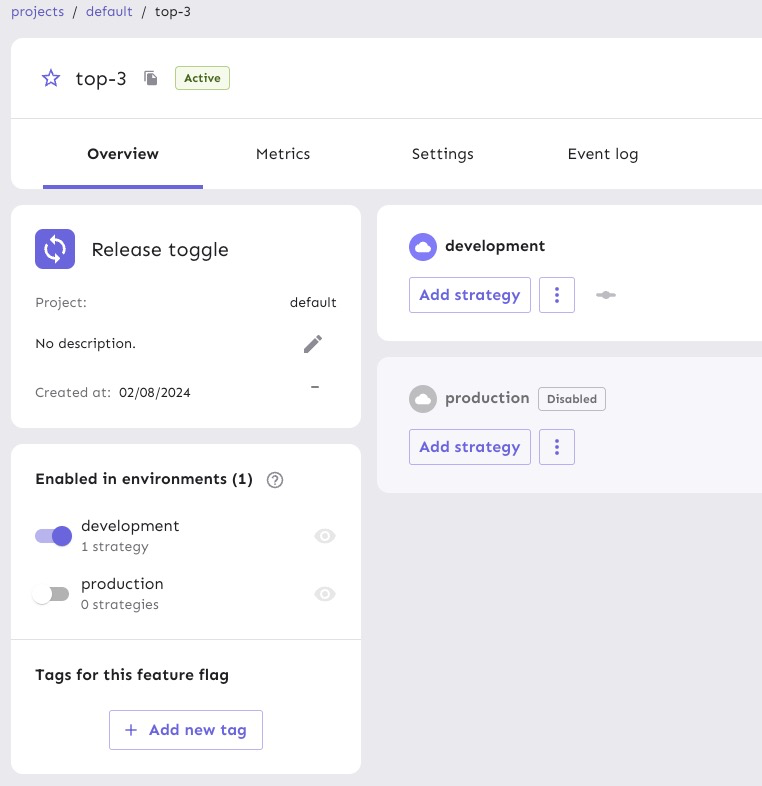
Click the ‘New feature flag’ button to create a new feature flag.
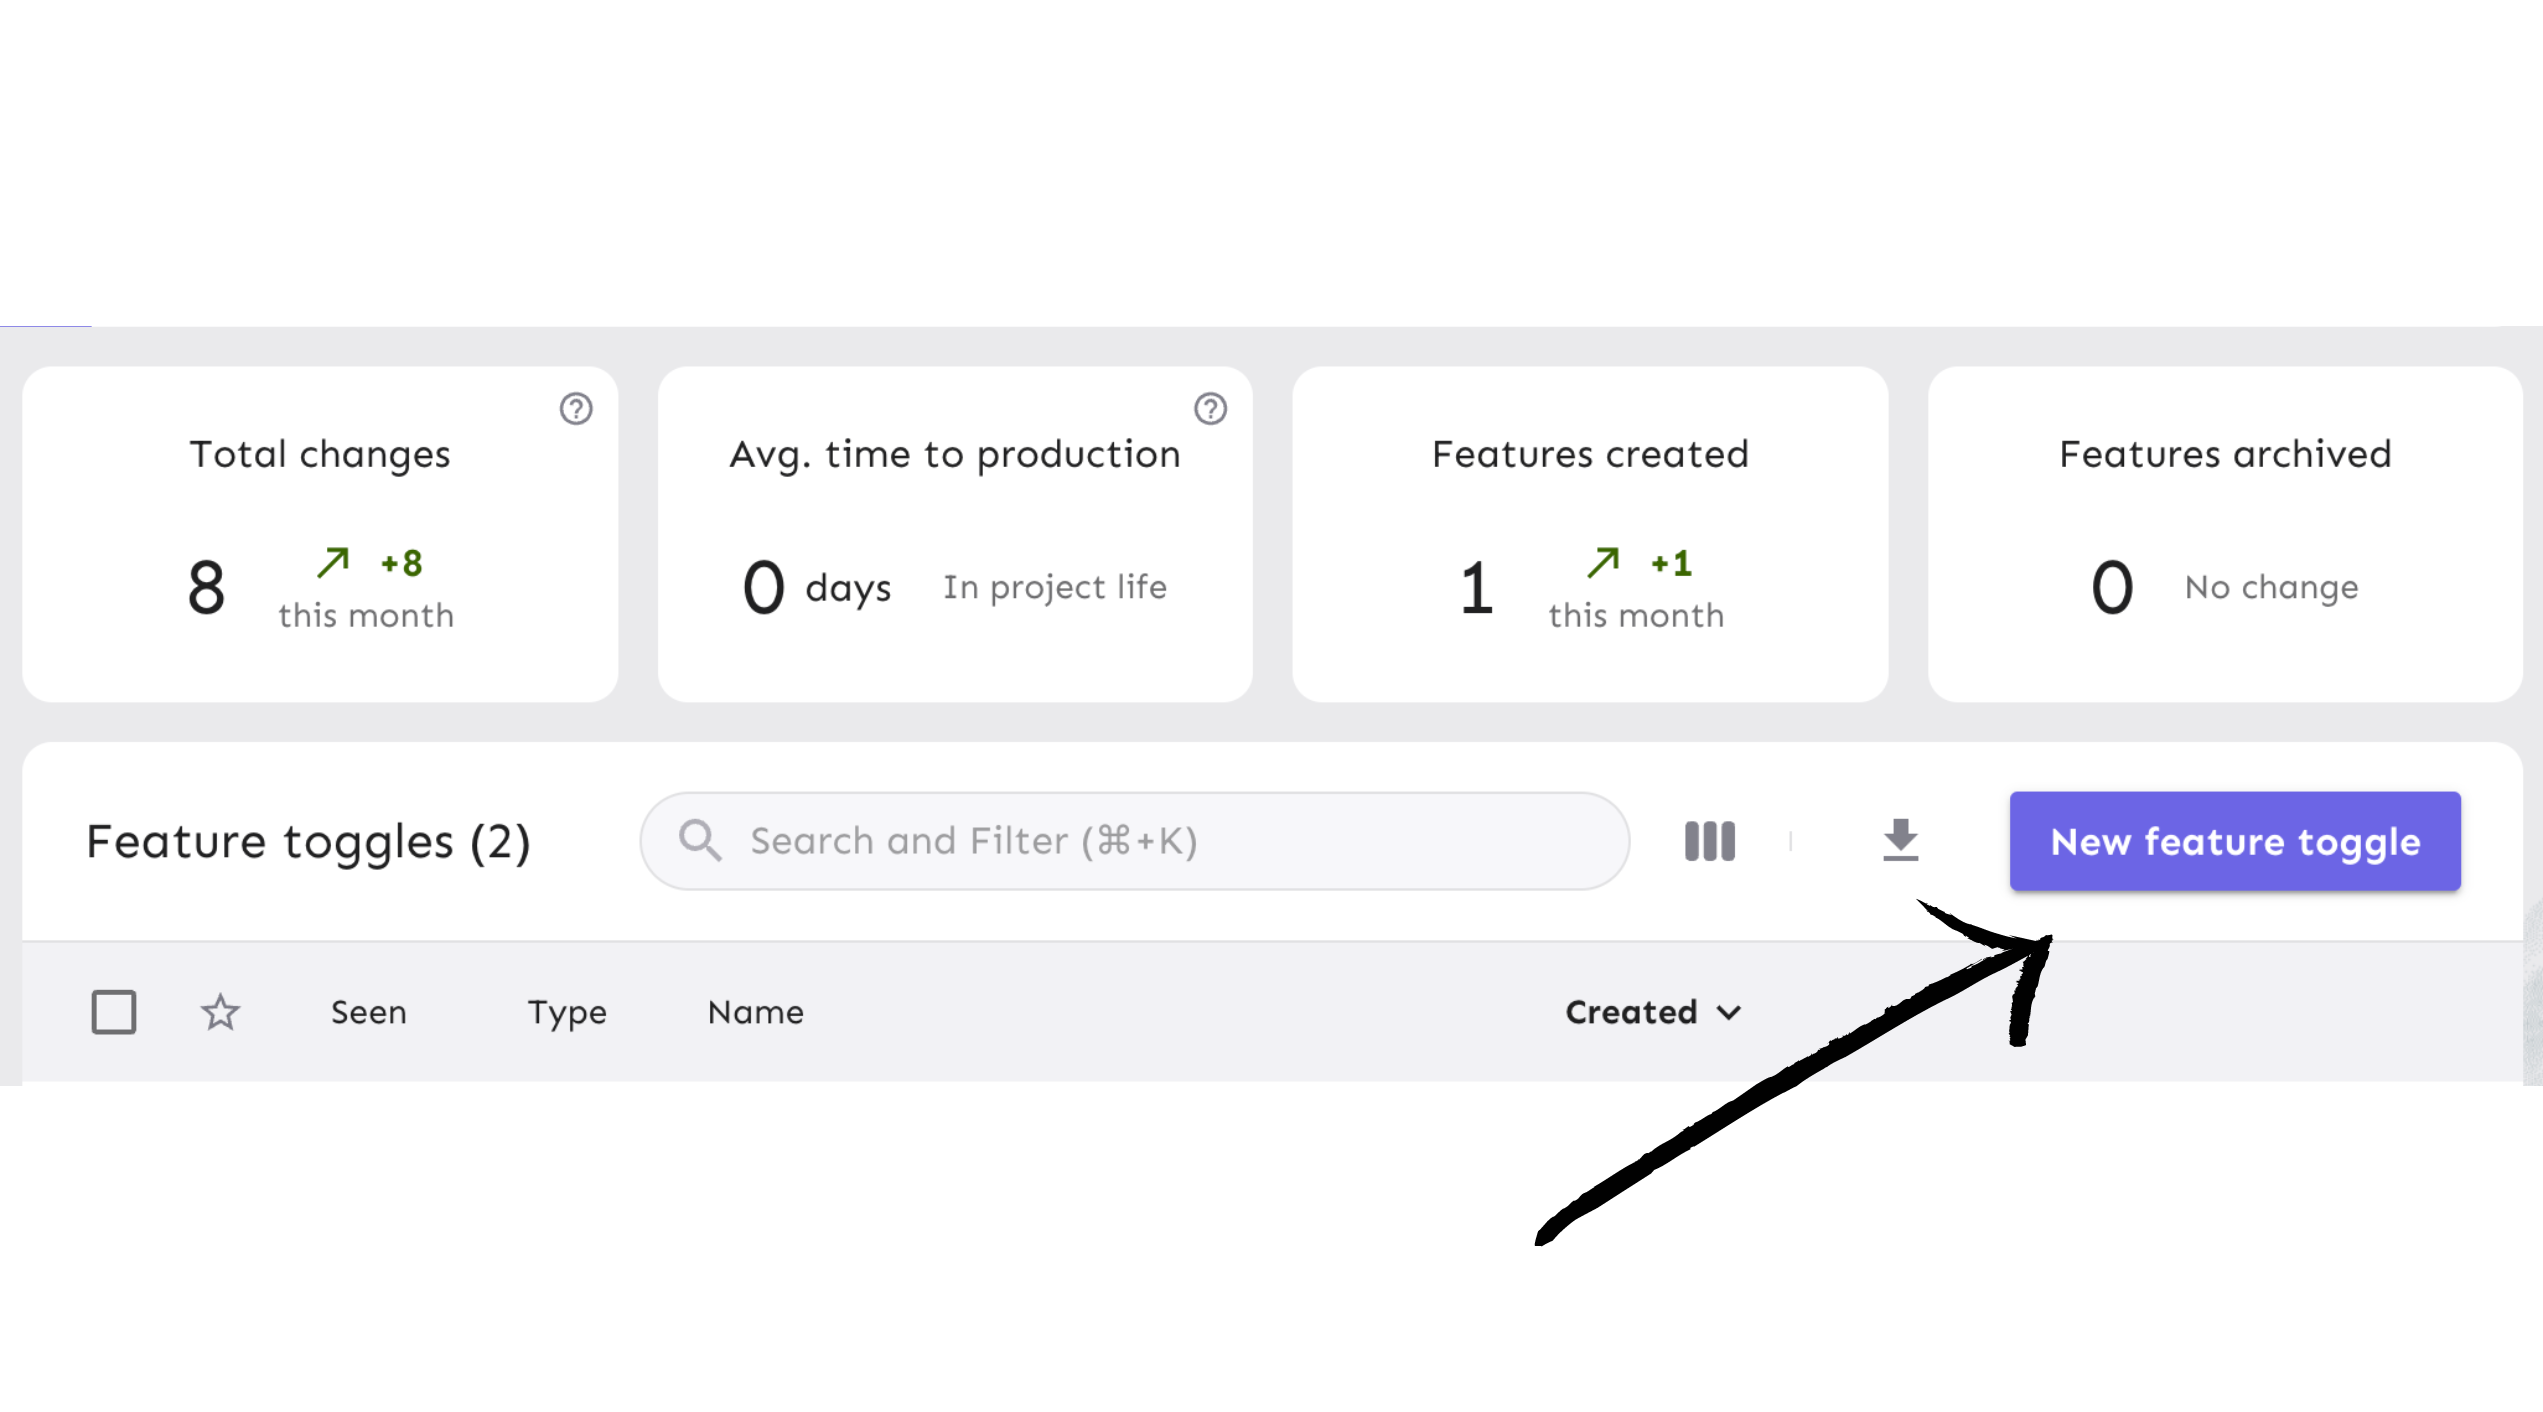
Call it top-3 and enable it in the development environment.
Everything’s now set up on the Unleash side. Let’s set up the Rails application.
3. Setup the Rails app
Let's clone a basic blog repository and get it up and running. We don't want to waste time setting up a Rails codebase from scratch.
git clone https://github.com/alvinometric/rails-basic-blog
cd rails-basic-blog
Install dependencies
bundle install
Setup DB
This repository uses SQLite, so no additional dependencies are required.
Run the migration
rails db:migrate
Seed the DB
rails db:seed
Run the server
rails server
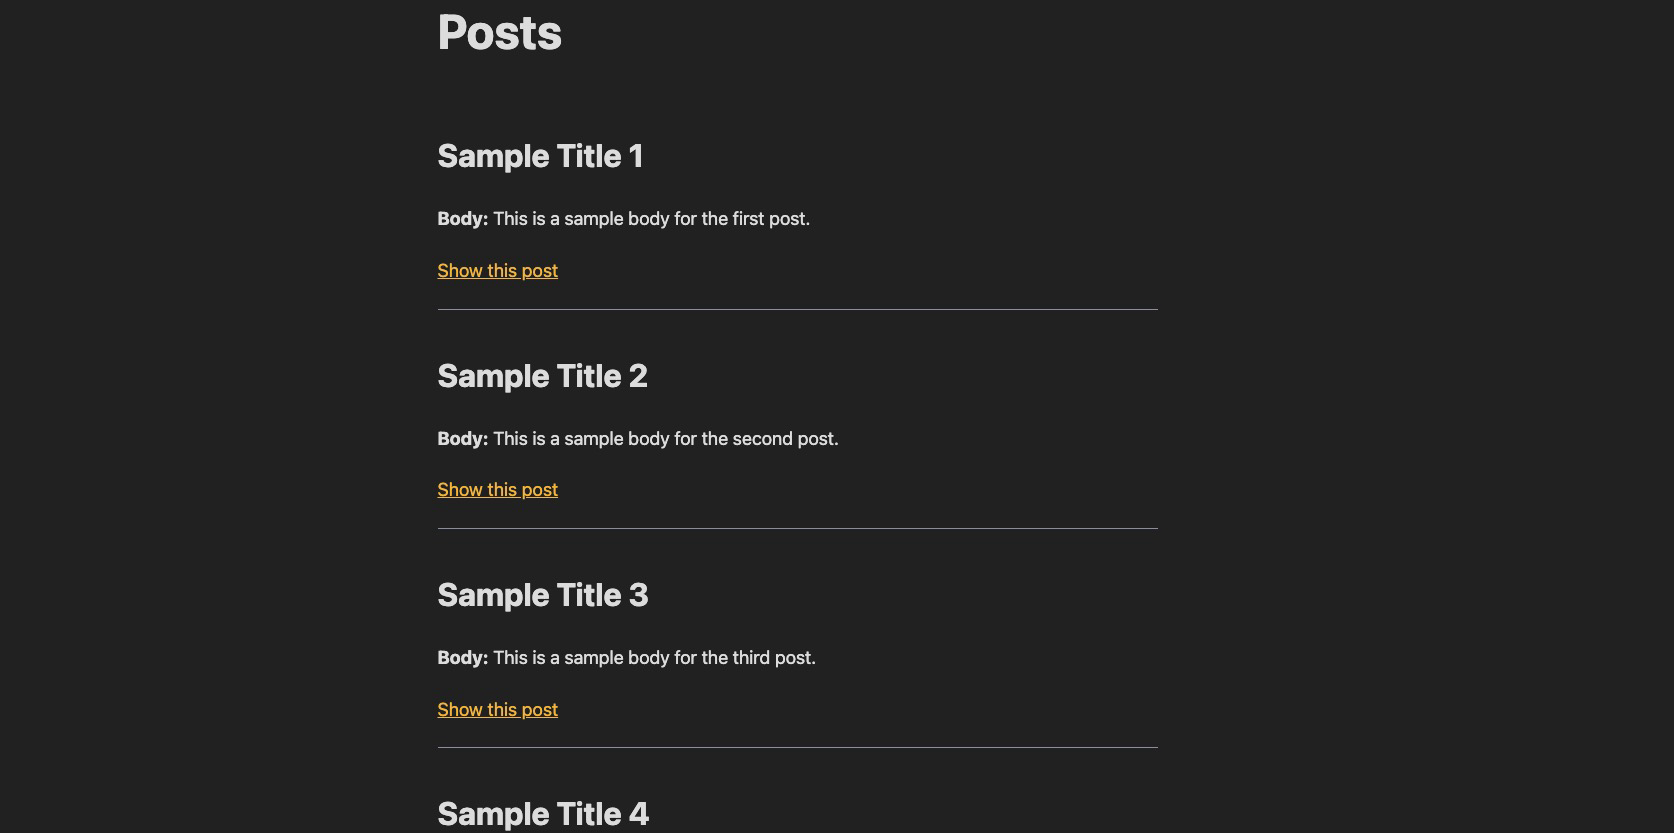
Go to http://localhost:3000 and check that you see the following:
4. Restrict the number of posts
Right now all the blog posts are displayed on the index page. We want to use a feature flag to change that and restrict it to the three most recent posts.
Let’s create a static boolean flag, for now.
Modify the index method in app/controllers/posts_controller.rb to look like this:
  # GET /posts or /posts.json
  def index
    is_top3 = true
    @posts = is_top3 ? Post.order(created_at: :desc).limit(3) : Post.all
  end
Reload your browser and you should see only the 3 most recent posts.
5. Add Unleash to your Rails app
Now, let’s connect our project to Unleash so that you can toggle the feature flag at runtime. If you wanted to, you could also do a gradual rollout, and use it for A/B testing or more advanced functionality.
You’ll need 2 things:
- The URL of your Unleash instance’s API. It’s
http://localhost:4242/api/for your local version. You’ll want to replace it with your remote instance. - The API token we created on our Unleash instance.
First, install the unleash gem.
gem install unleash
Then, create config/initializers/unleash.rb, and add the following:
Unleash.configure do |config|
  config.app_name = Rails.application.class.module_parent_name
  config.url      = 'http://localhost:4242/api/'
  # config.instance_id = "#{Socket.gethostname}"
  config.logger   = Rails.logger
  config.custom_http_headers = {'Authorization': '<YOUR_API_TOKEN>'}
end

UNLEASH = Unleash::Client.new
You can check our API tokens and client keys documentation for more information.
Then, in app/controllers/application_controller.rb, add the following method:
  before_action :set_unleash_context

  private
  def set_unleash_context
    @unleash_context = Unleash::Context.new(
      session_id: session.id,
      remote_address: request.remote_ip,
      user_id: session[:user_id]
    )
  end
Now, let’s add the Unleash client to our Rails controller, grab the feature flag from our local instance, and update our conditional statement. Don't forget to also update the config with your API key.
class PostsController < ApplicationController
  def index
    is_top3 = UNLEASH.is_enabled?('top-3', @unleash_context)
    @posts = is_top3 ? Post.order(created_at: :desc).limit(3) : Post.all
  end
6. Verify the toggle experience
Reload your browser and check that you see three blog posts displayed. Turn off the flag in your Unleash instance and reload the page. You should see all the blog posts again.
See additional use cases in our Server-Side SDK with Ruby documentation.
Note: An update to a feature flag may take 30 seconds to propagate.
Conclusion
All done! Now you know how to add feature flags with Unleash in Rails. You’ve learned how to:
- Install Unleash
- Create and enable a feature flag
- Grab the value of a feature flag with the Ruby SDK, and use it in a Rails app
Thank you